Vue.js 3 Firebase Firestore Setup Tutorial
In this Vue tutorial we learn how to set up a Firebase Firestore database.
We cover the SDK, the steps to set up and register an app and how to initialize the database.
Lesson Video
If you prefer to learn visually, you can watch this lesson in video format.
Lesson Project
If you want to follow along with the examples, you will need to create an app generated by the Vue CLI . If you already have a generated app from previous lessons, you can use it instead.
You will also need a Google account to be able to set up and use Firebase.
note This course is for Vue, not Firebase. As such, the following lessons will only cover the basics of working with Firestore databases. Please see the official Firebase documentation for any additional topics we didn’t cover.
What is Firebase?
Firebase is a service from Google that helps developers create mobile and web applications. It includes services such as authentication, realtime database, app hosting, analytics and machine learning.
Cloud Firestore database
Firestore is a no-SQL (not only SQL) database for mobile and web applications. It’s easy to work with, allows us to structure our data any way we want, can scale to global size and easily authenticate users.
note Firestore is the new and improved version of the Firebase realtime database.
How to install the Firebase SDK
The Firebase team provides us with a set of tools to easily interact with the Firestore database.
For example, we can use functions from the SDK to get and post data instead of using Axios or the Javascript Fetch API .
The SDK is available as an npm package. To install it, open a terminal/command prompt and run the following command in your project folder.
tip If you’re working in VSCode, you can go to Terminal > New Terminal to open a terminal or command prompt with the project folder already selected.
npm install firebaseWhen the installation has finished, open your package.json file. The SDK should show under the “dependencies” key.
"dependencies": {
    "core-js": "^3.6.5",
    "firebase": "^9.1.1",
We want any version above 9 because version 8 works a little different.
tip Version 9 was created to be more modular and allows us to import only the functionality that we need, like we do in Vue.
How to set up a new Firestore database
To set up a new Firestore database, we follow a simple 5 step process.
note You will need to have and be logged into a Google account to use Firebase.
- Step 1: Create a new project.
- Step 2: Create a new database.
- Step 3: Register an app for the database.
- Step 4: Initialize the connected app.
- Step 5: Initialize the database.
Step 1: Create a project
To create a project, we need to follow the steps below.
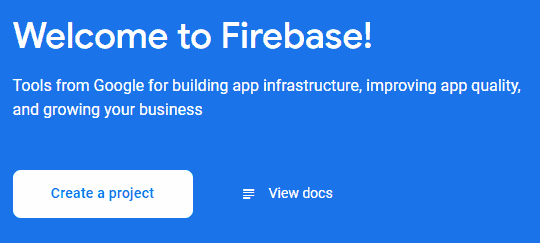
Point your web browser to the Firebase console or go to Firebase and click on the Go to console button.

In the console, click on the Create a project button.
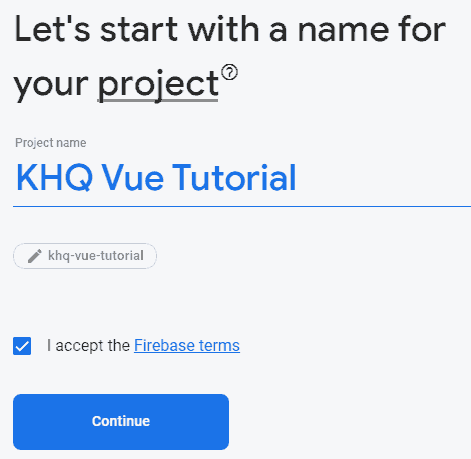
You can give your project any name you want and click on the Continue button. We chose “KHQ Vue Tutorial”.
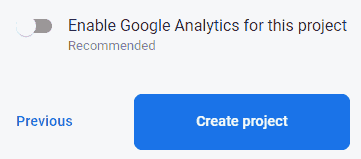
This is just a project to learn so we don’t need Analytics. You can toggle it off and click on the Create project button.
It may take a few seconds for Firebase to create your project. When it’s done, you can click on the Continue button.
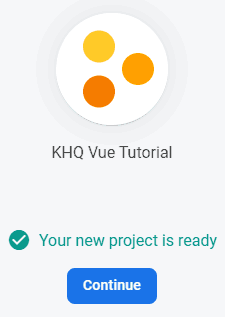
You will be taken to the project’s dashboard. If not, select Project Overview from the menu on the left.
Step 2: Create a database
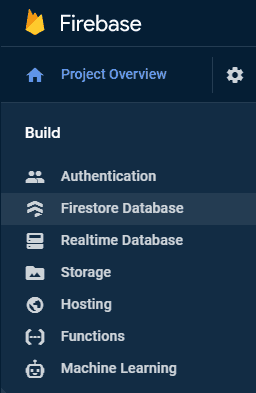
Once you’re inside the project dashboard, go to the menu on the left and select Build > Firestore Database .
From here, follow the steps below to create a new Firestore database.
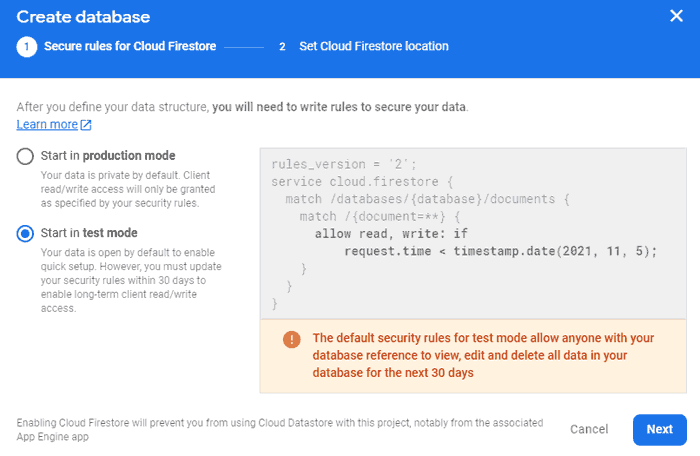
Click on the Create Database button.

In the pop-up screen, choose “Start in test mode” and click Next . We’ll secure the application later.
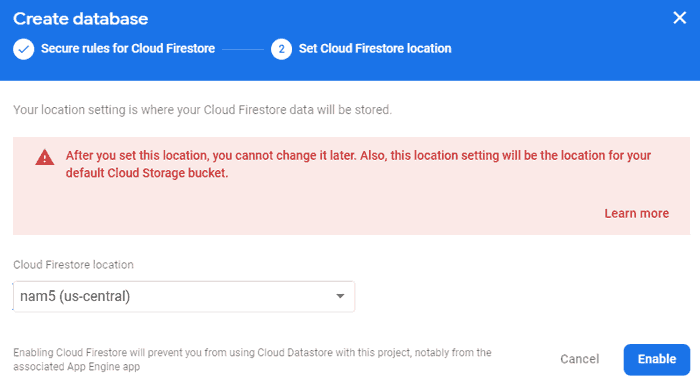
For the location we can leave the default location that Firebase chooses for us and click Enable .
Once the database has been created, you’ll be taken back to the project’s dasboard. If not, select Project Overview from the menu on the left.
Step 3: Register an app for the database
The next step is to connect our app to the database. To register an app, follow the steps below.
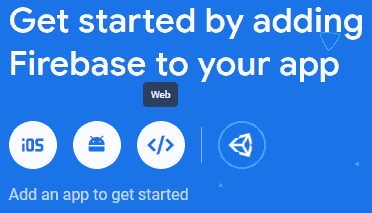
From the project’s dashboard, click on the Web button (the angle brackets with a slash icon).
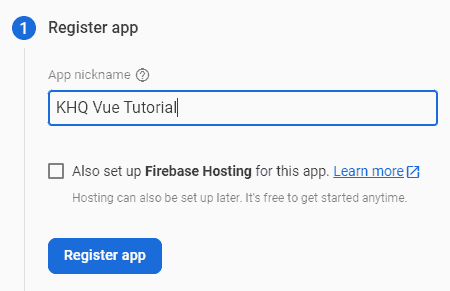
Give your app a nickname and click Register App . We chose the same name as the project, “KHQ Vue Tutorial”.
Firebase will give you a snippet of code that will help initialize it. You can copy the entire block of code, or just the configuration object.
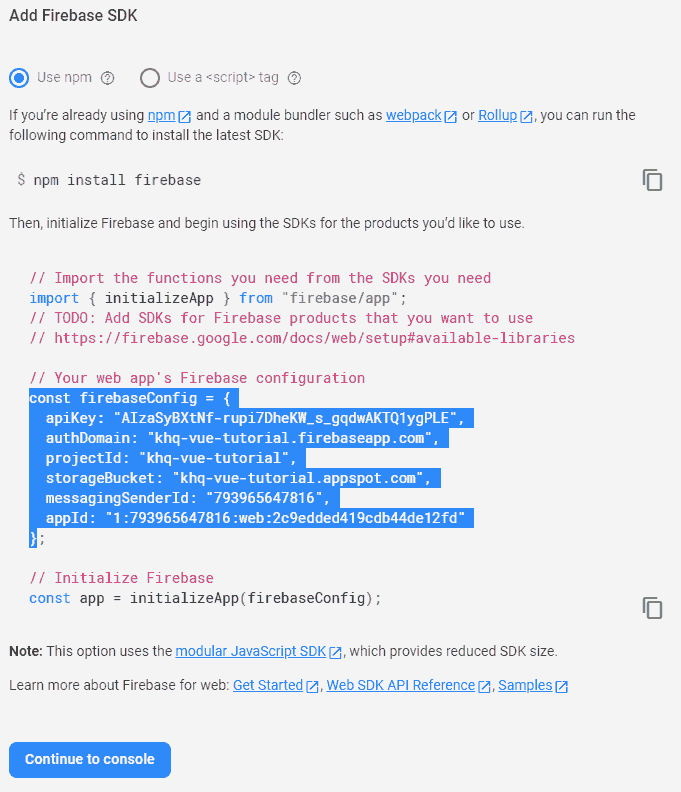
note It’s important that you use the config object that Firebase gives you and not the one in our screenshot. They aren’t interchangeable and ours will no longer be available.
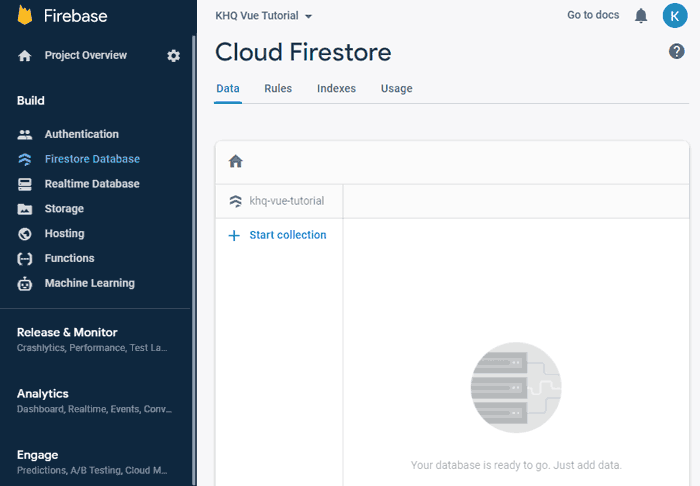
Your database should be set up and ready to go at this point. Select Firestore database in the menu on the left to see it, it should look something like the following.
Step 4: Initialize the connected app
Next, we’ll configure the database and initialize it so we can work with it in Vue.
In your project create a new file in /src/firebase/init.js .
The project should look similar to the following.
project-folder/
├── src/
|   ├── firebase/
|   |   └── init.js
|   └── App.vue
Inside the new file, paste the code snippet you copied from Firebase.
import { initializeApp } from "firebase/app"

const firebaseConfig = {
  apiKey: "AIzaSyBXtNf-rupi7DheKW_s_gqdwAKTQ1ygPLE",
  authDomain: "khq-vue-tutorial.firebaseapp.com",
  projectId: "khq-vue-tutorial",
  storageBucket: "khq-vue-tutorial.appspot.com",
  messagingSenderId: "793965647816",
  appId: "1:793965647816:web:2c9edded419cdb44de12fd"
}

const app = initializeApp(firebaseConfig)
If you need to find the code snippet again at any time, follow the steps below.
In the menu on the left, click on the cog icon and open up the Project Settings .
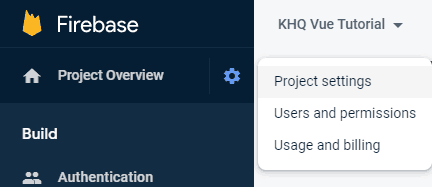
In the top menu select the General tab and scroll down to the “Your App” section.
tip You can disconnect the app from the database or delete the entire project on this page.
Step 5: Initialize the Firestore database
The code snippet that Firebase gives us imports the initializeApp method from the ‘firebase/app’ package and uses it to initialize the connected app with the config.
The final step is to initialize the Firestore service. To do that, we import the getFirestore method from the ‘firebase/firestore’ package and use it to initialize the service at the bottom of the script.
We’ll save it in a constant called db and export it so we can use it in components around the application.
tip The snippet Firebase gives us stores the initialization in a constant called app . We won’t use it at this point so it’s safe to invoke the method directly (see example below).
import { initializeApp } from "firebase/app";
import { getFirestore } from "firebase/firestore";

const firebaseConfig = {
  apiKey: "AIzaSyBXtNf-rupi7DheKW_s_gqdwAKTQ1ygPLE",
  authDomain: "khq-vue-tutorial.firebaseapp.com",
  projectId: "khq-vue-tutorial",
  storageBucket: "khq-vue-tutorial.appspot.com",
  messagingSenderId: "793965647816",
  appId: "1:793965647816:web:2c9edded419cdb44de12fd"
}

// init firebase
initializeApp(firebaseConfig)

// init firestore service
const db = getFirestore()
export default db
That’s it, we’re set up and ready to start working with Firebase in Vue in the next lesson .
Further Reading
For more information on the topics covered in this lesson, please see the relevant sections below.