Vue.js 3 Event Handling Tutorial
In this tutorial we learn how to handle events in Vue and execute code when events trigger.
We cover the binding directive, the event object and instance variable, modifiers and how to lock content beyond the initial component render.
Lesson Video
If you prefer to learn visually, you can watch this lesson in video format.
Lesson Project
If you want to follow along with the examples in this lesson, you will need an app generated by the Vue CLI . If you already have one from the previous lesson, you can use it instead.
Event handling with v-on
The majority of modern web applications need to react to certain things that happen in the browser, like the user clicking a button or entering text in an input field.
To interact with events, Vue gives us the v-on directive that we bind to any standard DOM event , like click or mouseover events. As the directive’s value, we can use simple inline expressions or a function.
<element v-on:event_name="method or expression" />
As an example, let’s create a button that changes a name data property when the user clicks on it. We’ll use an inline assignment expression to change the value of the data property.
<template>
  <p>{{ name }}</p>
  <button v-on:click="name = 'The Cooler Daniel'">Change name</button>
</template>

<script>
export default {
  data() {
    return {
      name: 'Daniel'
    }
  }
}
</script>
If we click on the button in the browser, it will change the name to the new one we specified in the v-on expression.
Event handling with methods
We mentioned earlier that the v-on directive’s value can be either an inline expression, or a method we define in the config object.
When we use a method that doesn’t have any parameters, we can reference it. That is to say we can omit the parentheses at the end.
// reference method without parameters
<element v-on:event_name="method_name" />

// invoke method with parameters
<element v-on:event_name="method_name(param1, param2, ...)" />
As an example, let’s put our name change logic into a method and reference the method in the v-on binding.
<template>
  <p>{{ name }}</p>
  <button v-on:click="changeName">Change name</button>
</template>

<script>
export default {
  data() {
    return {
      name: 'Chris Hemsworth'
    }
  },
  methods: {
    changeName() {
      this.name = 'Thunder Chris'
    }
  }
}
</script>
If we click on the button in the browser, it will change the name as expected.
To demonstrate method invoking, let’s use a parameter for the method instead of hardcoding the changing value.
<template>
  <p>{{ name }}</p>
  <button v-on:click="changeName('Captain Chris')">Change name</button>
</template>

<script>
export default {
  data() {
    return {
      name: 'Chris Evans'
    }
  },
  methods: {
    changeName(name) {
      this.name = name
    }
  }
}
</script>
Once again, clicking on the button will change the name.
How to use multiple methods on an event
Vue allows us to bind multiple methods or expressions to a single event. All we have to do is separate them with a comma.
// multiple methods separate by a comma
<element v-on:event_name="method_1(params), method_2(params)" />
To demonstrate, let’s change our example to include another data property that gets changed by a method on the event.
<template>
  <p>{{ name }} ({{ ego }})</p>
  <button v-on:click="changeName('Space Chris'), changeEgo('Starlord')">Change name</button>
</template>

<script>
export default {
  data() {
    return {
      name: 'Chris Pratt',
      ego: 'Actor'
    }
  },
  methods: {
    changeName(name) {
      this.name = name
    },
    changeEgo(ego) {
      this.ego = ego
    }
  }
}
</script>
When we click the button, both methods execute and the name as well as the ego changes.
note Events will be executed in the order they are specified in the directive.
The v-on directive shorthand
Because event handling is so common, the Vue team decided to create a shorthand for the v-on directive.
All we need to do is replace the v-on: (including the colon) with an @ symbol.
<element v-on:event_name="method or expression" />

// becomes

<element @event_name="method or expression" />
To demonstrate, let’s change our earlier example to use the shorthand.
<template>
  <p>{{ name }} ({{ ego }})</p>
  <button @click="changeName('War Chris'), changeEgo('Steve Trevor')">Change name</button>
</template>

<script>
export default {
  data() {
    return {
      name: 'Chris Pine',
      ego: 'Actor'
    }
  },
  methods: {
    changeName(name) {
      this.name = name
    },
    changeEgo(ego) {
      this.ego = ego
    }
  }
}
</script>
The Javascript Event Object
Certain events will require us to use the Javascript Event Object to access specific pieces of data about the event that occured.
The Event Object is a Javascript object that describes everything about the event that occured. For example, on a click event it will contain the exact x and y coordinates of where the mouse was clicked on the page, or whether the ctrl or alt keys were pressed during the click.
When we bind an event listener that executes a method, that method will automatically receive event (Event Object) as its first parameter. We can use it to access any event property or method .
funcName(event, other_params) {
  // access event object
  // through 'event' param
  event.property
}
If a method doesn’t have any parameters, we don’t need to specify event in the parameter list.
funcName() {
  // event is still
  // available
  event.property
}
To demonstrate, let’s create an example that displays text from an input field on the page.
We’ll bind to the input event on the text field and have it reference a method.
In the method we can then use the target attribute of the object and find the value of what was typed into the input field.
Then we simply assign that value to a data property and display the property in the template with string interpolation.
<template>
  <p>Your name: {{ name }}</p>
  <input type="text" @input="getInput">
</template>

<script>
export default {
  data() {
    return {
      name: ''
    }
  },
  methods: {
    getInput() {
      // get value of input on event object
      // and assign it to 'name' data property
      this.name = event.target.value
    }
  }
}
</script>
If we type a name in the text field in the browser, it will update the paragraph above it with that name.
A quick way to see the event object’s properties and methods is to add a console log.
<template>
  <p>Your name: {{ name }}</p>
  <input type="text" @input="getInput">
</template>

<script>
export default {
  data() {
    return {
      name: ''
    }
  },
  methods: {
    getInput() {
      this.name = event.target.value
      console.log(event)
    }
  }
}
</script>
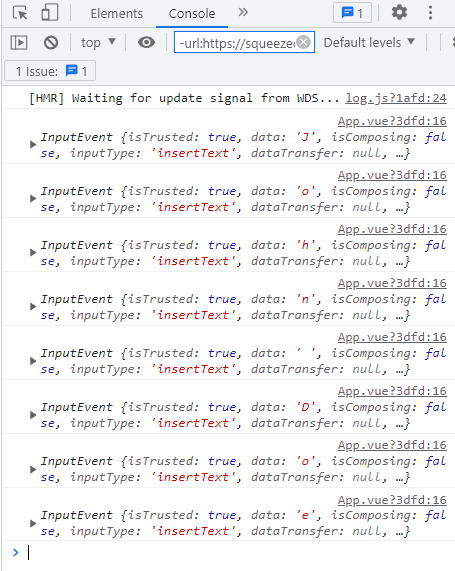
For each letter we type in the text field, it will create an InputEvent in the console. You can expand that InputEvent and see everything available, like the target .
Multiple parameters and the $event instance variable
If our event method has any additional parameters, the event parameter will be overridden by them.
To demonstrate, let’s add a last name to the previous example as a parameter to the method.
<template>
  <p>Your name: {{ name }}</p>
  <input type="text" @input="getInput('Johnson')">
</template>

<script>
export default {
  data() {
    return {
      name: ''
    }
  },
  methods: {
    getInput(event, lastName) {
      this.name = event.target.value + ' ' + lastName
    }
  }
}
</script>
If we try the example and type something into the input field, we get an error in the console.
Cannot read property 'value' of undefinedWhen Vue sees that there are more parameters after event , it won’t automatically shift the arguments to match those parameters. This is Vue’s default behavior, so we will have to manage it ourselves.
We have to use the special $event instance variable as the first argument where we invoke the function, then add any other arguments we need after it.
<template>
  <p>Your name: {{ name }}</p>
  <input type="text" @input="getInput($event, 'Johnson')">
</template>

<script>
export default {
  data() {
    return {
      name: ''
    }
  },
  methods: {
    getInput(event, lastName) {
      this.name = event.target.value + ' ' + lastName
    }
  }
}
</script>
This time when we start typing a name, it shows the characters we type and adds the last name.
Vue also allows us to have multiple methods with event access in an event handler. Because $event is an instance variable, we can specify it in each method and they won’t override each other.
<element @event="one($event), two($event)" />
Event modifiers
Event modifiers is another useful feature built into Vue that allows us to connect a modifier to an event to change the event’s behavior.
As an example, let’s say our application has a form with a submit button. When the button is clicked, the default behavior is to submit the form and send an HTTP request to the server
The problem is that this process refreshes the page which refreshes the application state. That means we lose any other data on the page.
To demonstrate, let’s create a counter with two methods that increment and decrement the count. We’ll also create a dummy form with a button that submits it.
<template>
  <p>{{ counter }}</p>
  <button @click="increment">Increment</button>
  <button @click="decrement">Decrement</button>

  <form><p>
    <button>Submit Form</button>
  </p></form>
</template>

<script>
export default {
  data() {
    return {
      counter: 0
    }
  },
  methods: {
    increment() {
      this.counter++
    },
    decrement() {
      this.counter--
    }
  }
}
</script>
When we click on the Increment/Decrement buttons, the number changes as we would expect. But if we then click on the Submit button, the number resets to 0.
Typically, when we work with a framework like Vue, we want to prevent this default browser behavior. Instead, we want to read the user input, validate it and then send it off to the server, which we can’t do if the value is lost.
There is a vanilla Javascript approach to solve this problem. We can add the Javascript event.preventDefault() method to a custom method that’s referenced when the form is submitted.
<template>
  <p>{{ counter }}</p>
  <button @click="increment">Increment</button>
  <button @click="decrement">Decrement</button>

  <form @submit="submitForm"><p>
    <button>Submit Form</button>
  </p></form>
</template>

<script>
export default {
  data() {
    return {
      counter: 0
    }
  },
  methods: {
    submitForm(event) {
      // prevent a page refresh
      event.preventDefault()
      alert('The form was submitted')
    },
    increment() {
      this.counter++
    },
    decrement() {
      this.counter--
    }
  }
}
</script>
This time, when we change the number and then submit the form, the counter value doesn’t change.
This is a perfectly valid approach to the problem, but Vue makes it a lot easier to do the same thing with modifiers.
How to use an event modifier
An event modifier is chained onto the event with dot notation.
<element @event_name.modifier_name />
Our previous example uses the preventDefault Javascript method. Its corresponding modifier is the prevent modifier, which is just Vue using the preventDefault method behind the scenes.
Let’s change the example by chaining the prevent modifier to the submit event. And because Vue will now handle the behavior with the modifier, we can remove preventDefault from the submitForm method.
<template>
  <p>{{ counter }}</p>

  <button @click="increment">Increment</button>
  <button @click="decrement">Decrement</button>

  <form @submit.prevent="submitForm"><p>
    <button>Submit Form</button>
  </p></form>
</template>

<script>
export default {
  data() {
    return {
      counter: 0
    }
  },
  methods: {
    submitForm() {
      alert('The form was submitted')
    },
    increment() {
      this.counter++
    },
    decrement() {
      this.counter--
    }
  }
}
</script>
If we change the number and submit the form, it works as expected. We did the exact same thing we could in Javascript, but with less code.
Click modifiers
Vue includes modifiers for click events such as left , right and middle .
@click.right
To demonstrate, we’ll use our earlier counter example and add click modifiers to the Increment/Decrement buttons.
<template>
  <p>{{ counter }}</p>

  <button @click.right="increment">Increment (Right-click only)</button>
  <button @click.middle="decrement">Decrement (Middle-click only)</button>
</template>

<script>
export default {
  data() {
    return {
      counter: 0
    }
  },
  methods: {
    increment() {
      this.counter++
    },
    decrement() {
      this.counter--
    }
  }
}
</script>
If we try to click on the buttons with anything other than the right and middle mouse buttons, nothing will happen.
Key modifiers
Another kind of modifier we can use is for keypresses. We can use them when we are listening to keyboard events, such as an input field.
As an example, let’s say we have a text input field that accepts a user’s name. But, we don’t want to show each character as the user types, like we did earlier in the lesson. We want to wait until they press Enter on their keyboard.
For that we would need to use the keyup event to detect when the user has pressed a key, and the enter modifier to check if they pressed the Enter key.
Once the use presses Enter , a method can execute that just takes the input from the text field and stores it in a data property.
<template>
  <p>Your name: {{ name }}</p>
  <input type="text" @keyup.enter="getConfirmedInput">
</template>

<script>
export default {
  data() {
    return {
      name: ''
    }
  },
  methods: {
    getConfirmedInput(event) {
      this.name = event.target.value
    }
  }
}
</script>
If we type a name into the input field in the browser, it won’t show in the paragraph until we press the Enter key.
Vue has aliases for all valid keyboardEvent keys. But there are a few things to note about some of them:
- The delete key will capture both delete and backspace .
- The meta key is the win key on Windows and the cmd key on Mac.
- The esc (Escape) key has inconsistent values and should ideally be avoided.
- We can use any valid key that’s been exposed via keyboardEvent.key , but only if it’s converted to kebab-casing. For example, pageUp becomes page-up .
<element @keyup.page-up>
The .exact modifier
Certain modifiers like ctrl or alt still allows other keys to be pressed at the same time. Vue allows us to limit this behavior to only include the modifier we specify by chaining exact onto the key.
// click without other
// keys being pressed
@click.exact

// only enter key pressed
@keyup.enter.exact
To demonstrate, let’s create 3 buttons with a click event handler that each reference a method. The method simply shows an alert when the button is clicked.
- The first button uses the shift modifier without exact . If we press something like shift + alt , it should still work.
- The second button uses shift with exact . It should only work if the shift key is pressed with the click.
- The third button uses exact without any key. It should only work if no keys are pressed with the click.
<template>
  <!-- This will work even if Shift and another key is pressed -->
  <p><button @click.shift="shiftAnyHandler">Shift + Any Click</button></p>

  <!-- This will only work when Shift and no other keys are pressed -->
  <p><button @click.shift.exact="shiftOnlyHandler">Shift Click Only</button></p>

  <!-- This will only work when no key modifiers are pressed -->
  <p><button @click.exact="clickOnlyHandler">Click only</button></p>
</template>

<script>
export default {
  methods: {
    shiftAnyHandler() {
      alert('Shift + Any Click');
    },
    shiftOnlyHandler() {
      alert('Shift Click Only');
    },
    clickOnlyHandler() {
      alert('Click Only');
    }
  }
}
</script>
tip If we use key combinations, it’s always a good convention to use exact to be explicit so that the user doesn’t get any unexpected results.
Key codes
Javascript Event Keycodes are deprecated and isn’t supported in newer browsers.
If you are working in an older browser that does support them, you can simply replace the key name with its associated keycode .
For example, the keycode for the Enter key is 13 .
<element @keyup.13>
How to lock content with v-once
If we want to lock dynamic content in an element, we can use the v-once directive on it. After rendering an element for the first time, Vue will treat it as static content and not rerender it.
The v-once directive takes no value and we can simply place it on the element.
<element v-once />
As an example, let’s say we have a dynamic counter that we can increment and decrement. Suppose we also want to show the initial starting value of the number, without hardcoding it into the template.
Typically, we would need two number data properties. One for the initial value and one that can be modified. There’s nothing wrong with that approach, but Vue allows us to do the same thing without the need for a second number.
We’ll use the counter example that we’ve been using throughout the lesson and add another paragraph that displays the initial counter value by locking it with v-once .
<template>
  <!-- lock this counter after first render -->
  <p v-once>Initial value: {{ counter }}</p>
  <p>Updated value: {{ counter }}</p>

  <button @click="increment">Increment</button>
  <button @click="decrement">Decrement</button>
</template>

<script>
export default {
  data() {
    return {
      counter: 10
    };
  },
  methods: {
    increment() {
      this.counter++
    },
    decrement() {
      this.counter--
    }
  }
}
</script>
If we change the number, the Updated value changes with it, but the Initial value that’s locked with v-once stays static.
This has several benefits over the typical approach:
- We don’t need a second number in the Logic.
- We know to look for locks in the View and not the Logic so testing and debugging is easier and faster.
- Because Vue treats it as static after the first render, it improves performance because it won’t be rerendered.