Vue.js 3 End-to-End (E2E) Testing Tutorial
In this Vue tutorial we learn how to test our application by simulating the steps a user would take in a browser with end-to-end (E2E) testing.
We cover the Cypress test runner and browser and how to write and run tests with it.
Lesson Video
If you prefer to learn visually, you can watch this lesson in video format.
Lesson Project
If you want to follow along with the examples, you will need to create an app generated by the Vue CLI and add E2E Testing with Cypress.
We want to Manually select features.
? Please pick a preset:
  Default ([Vue 2] babel, eslint)
  Default (Vue 3) ([Vue 3] babel, eslint)
> Manually select features
Then add E2E Testing.
? Check the features needed for your project:
 (*) Choose Vue version
 (*) Babel
 ( ) TypeScript
 ( ) Progressive Web App (PWA) Support
 ( ) Router
 ( ) Vuex
 ( ) CSS Pre-processors
 (*) Linter / Formatter
 ( ) Unit Testing
>(*) E2E Testing
Then select Cypress as the testing solution.
? Pick an E2E testing solution: (Use arrow keys)
> Cypress (Chrome only)
  Nightwatch (WebDriver-based)
  WebdriverIO (WebDriver/DevTools based)
What is End-to-End (E2E) testing?
End-to-End testing checks that the combined parts of our application behave as we would expect. It simulates the steps a user would take when using our app.
As an example, let’s consider an application that increases a counter when the user clicks on a button. An End-to-End test for it would take the following steps.
- Open the browser.
- Load the URL.
- Press the button.
- Select the element that holds the counter value.
- Compare the new value to the starting value.
- End the test.
This may seem like the only type of test we’ll ever need, but trying to automate user behavior in a browser has some problems.
- E2E tests are slow. Some tests may take up to an hour or more to complete.
- E2E tests are more difficult to debug. We may know which test failed, but not why. We’ll have to manually retrace the steps of the test to find the bug.
- E2E tests that rely on external services/APIs can fail because the service is down. There might not even be anything wrong with the app itself.
Generally, End-to-End tests are not the most reliable method of testing and many developers don’t use it at all.
On the other hand, End-to-End testing can be very useful because unlike unit and snapshot testing, it allows us to see how different parts of the app work together.
What is Cypress?
The two most popular tools for performing End-to-End tests are Nightwatch and Cypress .
We’ll be using Cypress as the E2E framework in this course because we find it to be faster and easier to use than Nightwatch.
The downside to Cypress is that it uses a built-in version of the Chromium browser. The tests will only be valid for Chromium-based browsers like Google Chrome, Microsoft Edge and Brave. Browsers like Firefox and Opera will have to be manually tested.
Cypress file structure
Although we can store our E2E test files anywhere in the project, the convention in Vue is to store them in /tests/e2e/ in the project’s main directory.
When we scaffold a new project that includes E2E testing, the CLI will create the following files and folders.
project-name/
├── public/
├── src/
|
├── tests/
|   ├── e2e/
|   |   ├── plugins/
|   |   |   └── index.js
|   |   |
|   |   ├── specs/
|   |   |   └── test.js
|   |   |
|   |   ├── support/
|   |   |   ├── commands.js
|   |   |   └── index.js
|   |   |
|   |   └── eslintrc.js
|
└── cypress.json
The cypress.json file in the root directory is the configuration object that defines the plugins file for Cypress. Plugins allow us to modify or extend internal behavior like compiling TypeScript code before running a test.
The /plugins/index.js file that it links to should look similar to the following.
module.exports = (on, config) => {

  return Object.assign({}, config, {
    fixturesFolder: 'tests/e2e/fixtures',
    integrationFolder: 'tests/e2e/specs',
    screenshotsFolder: 'tests/e2e/screenshots',
    videosFolder: 'tests/e2e/videos',
    supportFile: 'tests/e2e/support/index.js'
  })
}
The function that’s being exported has several options.
- fixturesFolder . Fixtures are files that hold data that can be used globally in any of our tests.
- integrationFolder . Integrations are the actual test files. Because Cypress knows exactly where to look for test files, we don’t need to add something like .spec to the file names like we did with Jest.
- screenshotsFolder . Cypress allows us to save screenshots at certain points in a test for later review.
- videosFolder . Cypress allows us to save videos of tests for later review.
- supportFile
. Supports are files that Cypress loads before a test runs and allow us to create custom commands.
- Commands are actions that prevent us from having to write repetitive code, such as logging into an app. Like fixtures, the can be used globally in any of our tests.
How to write an End-to-End (E2E) test with Cypress
The API for writing E2E tests is like that of Unit testing , most testing tools adopt similar features and syntax.
Cypress uses a test interface borrowed from Mocha . That means we can use describe..it syntax like we did with Jest.
describe('identifier', () => {

  it('test description', () => {
    // test logic
  })

})
We can also use context instead of describe and specify instead of it . You can choose whichever terminology you like best, but we recommend sticking with describe..it syntax to avoid confusion between testing frameworks.
If we open the /tests/e2e/specs/test.js file that the CLI generated for us, we should see an example test that also uses describe..it syntax.
describe('My First Test', () => {
  it('Visits the app root url', () => {
    cy.visit('/')
    cy.contains('h1', 'Welcome to Your Vue.js App')
  })
})
Inside the it block however, are two new statements.
Cypress provides us with numerous global functions that help us test our application. These functions can be accessed through the cy object with dot notation.
A list of all the functions is available in the official Cypress API Documentation . Let’s take a quick look at the two in the test.
- cy.visit will visit the URL we specify. The CLI has configured Cypress with a base URL to allow us to use relative URLs. That’s why we only need to specify “/” instead of the full address to go to the home page.
cy.contains looks for an element in that page and checks if a part of its content matches what we specify.
Cypress uses the standard Javascript querySelector so we can use elements, classes, id’s etc. to select an element.
The testing required depends on your project and unfortunately we can’t cover every case. But because the tests are so similar to Jest, it won’t be difficult for you to write if you keep the Documentation handy.
We’ll leave the test “as-is” and just show you how to run the suite.
How to run your tests
When the project generated, it created a new testing script in the package.json file.
"test:e2e": "vue-cli-service test:e2e",So all we need to do is run the following command to start the Cypress UI.
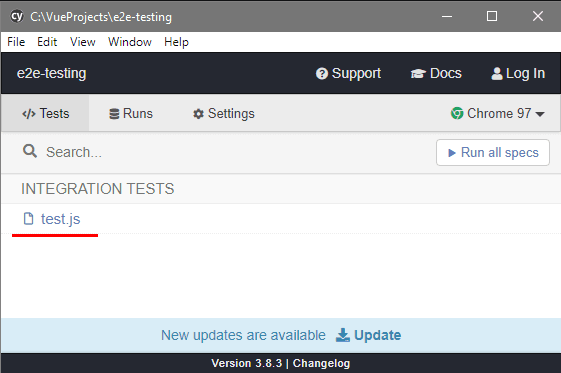
npm run test:e2eExecuting the command will tell Cypress to compile the application and start a development server. It will also open the Cypress Test Runner.
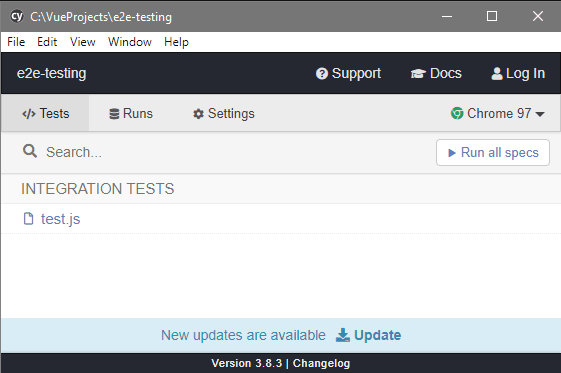
This program allows us to view and start the tests that are registered for our app. To start an individual test, click on its file name in the window.
Cypress will then launch its custom browser and start running the test.
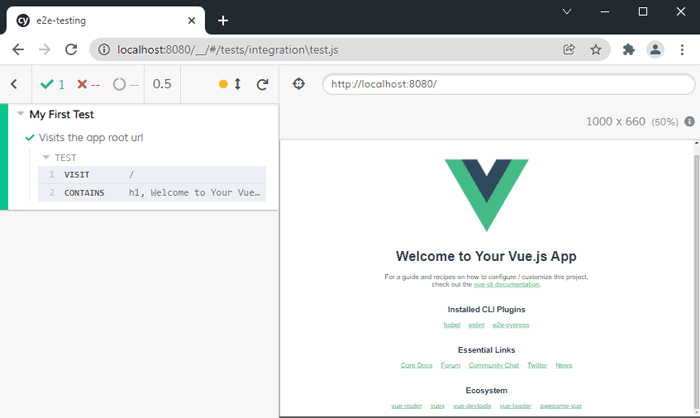
Let’s quickly take a look at the browser window. The window is divided into two parts.
The pane on the left contains information about the test as well as additional tools to interact with it.
The operations log allows us to inspect each phase of the test by hovering over it. Doing that will update the page on the right and allow us to see what was happening in the test.
A green checkmark next to the test name in the log shows that it passed.
The pane on the right is the browser and we will be able to see Cypress performing the tests while it runs.
Further Reading
For more information on the topics covered in this lesson, please see the relevant section below.