First Sass/SCSS script
In this Sass/SCSS tutorial we write our very first Sass and SCSS script and compile it into a CSS stylesheet.
We cover a simple project structure, how to compile Sass/SCSS with the command line and how to automate the compilation process.
Simple project structure
Before we write our first script, let’s create a space for everything to live in.
note Project structure for Sass is an important topic that we cover in the Sass Project Structure lesson. For now though, we’ll be using a something simple.
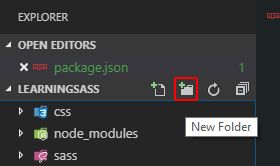
Inside the “LearningSass” project folder, create the following two folders.
- Name the first folder “css”. This will contain our compiled CSS file that’s referenced in the HTML document.
- Name the second folder “sass”. This will contain our Sass/SCSS scripts.
If you’re using VS Code as your IDE, you can simply right-click in the Project Explorer pane to the left and select New folder. You can also use the buttons in the project bar to create new files and folders.
If you’re using another IDE like Atom, you will also be able to create new folders in the project directly from the Project Explorer pane.
If you want to use the terminal to create new folders, navigate to your “LearningSass” folder and execute the following commands.
mkdir sass cssWindows, Mac and Linux all use the mkdir folder_name command to create new folders. We can create multiple folders at once by simply separating their names with a space.
First SCSS script
Please see the next section of this lesson if you want to use the older indented Sass syntax instead of the newer SCSS syntax.
Inside the “sass” folder in the project, create a new file called main.scss .
As a simple example in our first script, we’ll change the background color of the body. Write or copy the following code in your main.scss file and save it.
body {
  background: #000;
}
The code above looks exactly like standard CSS. That’s because, apart from Sass specific features like nesting, SCSS looks exactly like standard CSS.
First Sass script
Please see the previous section of this lesson if you want to use the newer SCSS syntax instead of the older indented Sass syntax.
Inside the “sass” folder in the project, create a new file called main.sass .
For our first script we’ll do something simple. Let’s change the background color of the body element. Write or copy the following code into your main.sass file and save it.
body
  background: #000
Sass syntax looks similar to standard CSS, but without any curly braces or semicolons.
Example HTML
Next, we’ll create a simple HTML document to apply the style to. Create an index.html file in the “LearningSass” folder and copy the following HTML code into it.
<!DOCTYPE html>
<html lang="en">
<head>
  <meta charset="UTF-8">
  <meta name="viewport" content="width=device-width, initial-scale=1.0">
  <meta http-equiv="X-UA-Compatible" content="ie=edge">
  <link rel="stylesheet" href="css/style.css">
  <title>Document</title>
</head>
<body>

</body>
</html>
This will link to a CSS file called style.css in the “css” folder.
The file doesn’t exist yet, and we don’t create it manually it either. When we compile the script, it will automatically create the file for us.
tip If you’re using VS Code or any IDE with the Emmet extension installed, you can use the following shortcuts to create the HTML in the example above.
- For the HTML boilerplate type ! and then press Tab .
- For the stylesheet link, type link:css and press Tab . Don’t forget to edit the link to point to style.css .
You can find a cheatsheet for Emmet in the official documentation .
Compiling Sass/SCSS scripts
To compile a Sass/SCSS script, we use the sass command in the terminal.
We write the word sass , followed by the location of the sass script we want to compile, and then the location of the css file it should compile to.
sass source_script.sass compiled_css_file.cssWe want to compile our “main” script in the sass folder, to a CSS file called “style” in the css folder. So, our command would look as follows.
sass sass/main.scss css/style.csssass sass/main.sass css/style.cssOnce the script has finished compiling, we can open the newly generated style.css file. It should look similar to the following.
body {
  background: black; }
If we open up the HTML file in the browser, we can see that the background color has indeed changed to black.
That’s it! You just wrote and compiled your first Sass/SCSS script and are now ready to start learning all the cool stuff.
The sections below are optional but recommended to make life a little easier for you while you’re developing.
Auto compilation
When we’re developing our stylesheet, we move back and forth between the CSS and HTML a lot to test our changes.
It would be tedious to type out that full line of compilation code every time we want to compile our script.
Instead, we can let Sass compile our script automatically each time we save the file so we only have to type the command once.
We do that with the x--watch flag. When we use the flag, we must also separate our source file from our output file with a colon instead of a space.
sass --watch sass/main.scss:css/style.csssass --watch sass/main.sass:css/style.cssWhen we run the command above, Sass will compile the script each time we save the file.
If we now make a change to the script, like change the color to blue for example, we will see console print the following message.
Change detected to: sass/main.sass
      write css/style.css
      write css/style.css.map
And if we go back to the browser and refresh the page, we’ll see the background color changed to blue.
If we don’t want to watch the file anymore, we can press Ctrl C to stop it, or simply close the terminal.
NPM custom tasks (scripts)
We can make our compile command even shorter by defining a custom NPM task, also known as an NPM script.
Open the package.json file in the code editor. It should look something like the example below.
{
  "name": "LearningSass",
  "version": "1.0.0",
  "description": "",
  "main": "index.js",
  "scripts": {
    "test": "echo \"Error: no test specified\" && exit 1"
  },
  "keywords": [],
  "author": "",
  "license": "ISC",
  "devDependencies": {
    "sass": "^1.26.8"
  }
}
We’re interested in the entry under “scripts”. These are commands that we can execute in the terminal.
A command is specified as a key:value pair, each wrapped in quotes and separated by a colon.
The key is the command we type in the terminal and the value is the script that executes.
- Key (command): test
- Value (script): echo \"Error: no test specified\" && exit 1
Let’s modify this script and add our watch command to be executed.
"watch:sass": "sass --watch sass/main.scss:css/style.css""watch:sass": "sass --watch sass/main.sass:css/style.css"The package.json file should now look something like this with our new command added.
{
  "name": "LearningSass",
  "version": "1.0.0",
  "description": "",
  "main": "index.js",
  "scripts": {
    "watch:sass": "sass --watch sass/main.scss:css/style.css"
  },
  "keywords": [],
  "author": "",
  "license": "ISC",
  "devDependencies": {
    "sass": "^1.26.8"
  }
}
From now on we can simply type the new command and it will automatically compile our sass script.
NPM scripts like these are executed with the npm run command. So to run our script, we have to type the following command.
npm run watch:sassThe terminal should show the following message.
Sass is watching for changes.Change the background color to red this time and save it. Go back to the browser and refresh the page and the background color will be red.
Live server & parallel tasks
We’re not limited to only watching for changes in our Sass code, we can do it with our HTML as well.
To do this we need to install the Live Server NPM package into our project, just like we installed Sass.
npm i @compodoc/live-server --save-devOnce this package has been installed, we can create a script and add it to the NPM task list, separating them with a comma.
The scripts entry in the package.json file should now look like this.
{
  "name": "LearningSass",
  "version": "1.0.0",
  "description": "",
  "main": "index.js",
  "scripts": {
    "watch:sass": "sass --watch sass/main.scss:css/style.css",
    "devserver": "live-server"
  },
  "keywords": [],
  "author": "",
  "license": "ISC",
  "devDependencies": {
    "live-server": "^1.2.1",
    "sass": "^1.26.8"
  }
}
What we could do at this point is open another terminal tab and run the live server, but there’s a better way.
We can combine the two tasks and run them both at once with the npm-run-all package , so let’s install it as well.
npm install npm-run-all --save-devOnce the package is installed, we can create the command that allows us to run multiple tasks.
npm-run-all task_1 task_2This command will run the specified tasks in sequence. If we want to run both at the same time, we simply add the --parallel flag.
Now let’s create a third task that will run the other two. The package.json should then look like this.
{
  "name": "LearningSass",
  "version": "1.0.0",
  "description": "",
  "main": "index.js",
  "scripts": {
    "watch:sass": "sass --watch sass/main.scss:css/style.css",
    "devserver": "live-server",
    "start": "npm-run-all --parallel devserver watch:sass"
  },
  "keywords": [],
  "author": "",
  "license": "ISC",
  "devDependencies": {
    "live-server": "^1.2.1",
    "sass": "^1.26.8"
  }
}
Now we only need to run a single short command once when we start working. Our workflow is a lot more efficient.
npm run startWe can test it by executing the command above, then changing the background color again in our Sass script and saving the file.
Our Sass will be compiled automatically and the browser will refresh with the updated changes.
Summary: Points to remember
- SCSS files use the .scss extension and indented Sass files use the .sass extension.
- Any valid standard CSS will work fine in a SCSS file.
- Indented Sass does not use curly braces or semicolons.
- We compile a Sass/SCSS script with the command:
sass source output
.
- If we want Sass to automatically watch for changes, we add the --watch flag.
- We can add custom commands to the package.json file as tasks (scripts).
- NPM packages like Live Server and NPM-run-all help optimize our workflow.