Java Workspace & First app Tutorial
In this Java tutorial we set up a workspace to develop Java apps.
We discuss the concept of a workspace and how to create a new Java project in Eclipse.
Finally, we write our first simple Java app that prints a message to the console.
Development Workspace
Before we write our first Java app, we need to create a workspace, or at least a project.
- Projects are the individual applications we want to create. For example, if we wanted to create a Media Player and a Calculater app, they would be separate projects.
- A workspace is where all our projects are stored, as well as some of the IDE’s settings.
If you’re not following along with Eclipse, you may have to follow a different process to create a workspace or project in your IDE.
- IntelliJ IDEA: How to create a new Java Project
- NetBeans: How to create a new Java Project
- BlueJ: How to open a project (Step 4.)
- JDeveloper: How to create a new workspace and project
Create a project in your IDE and call it ‘LearningJava’.
If you are following along with Eclipse, please see the two sections below on how to setup a workspace, and how to create a new project.
Otherwise, go to the First App Section of this lesson.
How to setup a workspace in Eclipse
When we run Eclipse, the launcher will pop up and ask us to select a directory for our workspace.
A workspace in Eclipse is a directory to store all our separate projects.
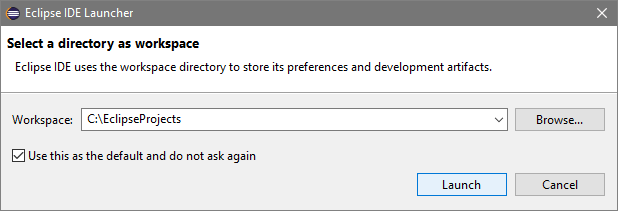
We chose a folder on our C:\ drive called ‘EclipseProjects’.
We also chose to use this workspace as our default, and not ask again. If this checkbox is not selected, the launcher will ask you to select a directory every time you run Eclipse.
If Eclipse doesn’t show the launcher, don’t worry, you can set the workspace by going to File > Switch Workspace > Other.
How to create a new Java Project in Eclipse
Projects are the individual applications we want to create.
For example, if we wanted to create a Media Player and a Calculater app, they would be separate projects, but still be stored in the same workspace.
To create a new project in Eclipse, we choose File > New > Java Project.
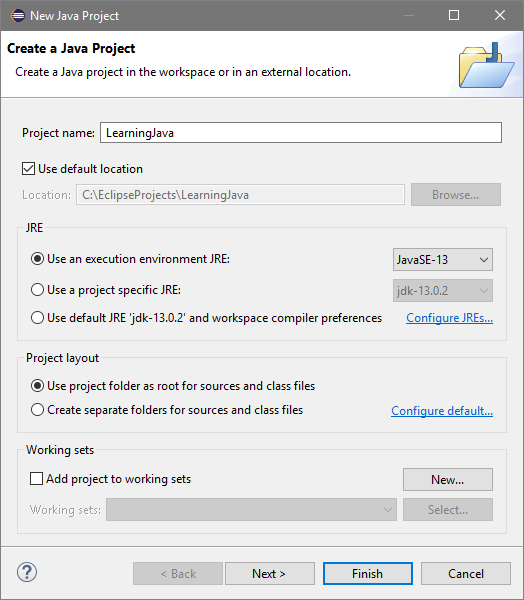
Choose the same parameters for your project.
- Project name: LearningJava
- Use default location: Checked
- Use an execution environment JRE: JavaSE-13
- Use project folder as root for sources and class files: Selected
- Add project to working sets: Unchecked In a production environment we would typically separate source and class files, as well as modify some project specific settings.
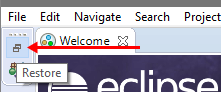
Click Finish and wait for the project to load in Eclipse.
If you only see the Welcome page, find and click on the Restore button in the top left corner, or simply close the Welcome page.
First Java App
We’re finally ready to start programming. We’ll write a simple application that prints a message to the console.
If you’re not using Eclipse:
- Create a new class file called ‘Program.java’.
- Copy and paste the code below into the file.
- Compile/Run the file.
If you are using Eclipse:
- Go to File > New > Class.
- In the New Java Class window, specify the Name as ‘Program’.
- Click Finish.
- Copy and paste the code below into the file.
- To compile and run the application, go to Run > Run or click on the big round green ‘play’ button on the taskbar.
public class Program {

    public static void main(String[] args) {

        System.out.println("Hello, World!");
    }
}
In the terminal/console window you should see the following output.
Hello, World!Congratulations, you’ve just written, compiled and ran your first Java application.