Java Development Environment Setup Tutorial
In this Java tutorial we set up our development environment by installing the Java Development Kit (JDK), and the IntelliJ IDEA Integrated Development Environment (IDE).
We also list a few alternative IDEs in case you don't want to use IDEA.
Java Development Environment
Before we can start developing Java applications, we need to install a few things on our system.
1. The Java Development Kit (JDK)
As mentioned in the Introduction to Java lesson, the JDK contains everything we need to develop Java applications, like the JRE and JVM.
2. An Integrated Development Environment (IDE)
An IDE is essentially a text editor with extra features that allows us to compile, run and debug code. Most IDEs also provide syntax highlighting, code completion, and linting (with or without additional plugins).
In this tutorial course, we’ll use one of the three most popular free IDEs in the world, Eclipse. If you don’t want to use Eclipse, we cover a list of alternatives in the Alternative Java IDEs section further along on this page.
We recommend that you follow along with Eclipse while learning, even if you won’t be using it in your production environment.
How to install the Java Development Kit (JDK)
Please follow the steps below to install the JDK on your system.
1. Point your browser to the Official Oracle JDK download page .
2. The latest version should be at the top of the page, click on the ‘Download’ button.
At the time of writing, the latest version is 13.0.2
3. Scroll down to the file selection section, click on the radio button next to Accept Licence Agreement, and choose the file appropriate for your system to download.
- Windows users can download the .exe file
- Mac OSX users can download the .dmg image
- Debian-based Linux (like Ubuntu/Mint) users can download the .deb file
- Red Hat Linux users can download the .rpm file
4. Once the download has finished, run the executable/image/package files and follow the wizard to install the JDK on your system.
If you get stuck, or want to see more detailed installation instructions, please see the Official Oracle JDK 13 documentation sections below.
How to set the JDK PATH environment variable
Next, we need to add the directory path, where the JDK installed to, to the PATH environment variable.
- Right-click the Start/Windows button (or simply the bottom-left corner of the screen) to open the Power User Task Menu.
- From there, click Settings.
- In the Settings window, in the search box, type ‘System Info’ and click on the System option in the drop-down list. This opens Control Panel > System and Security > System.
- Click on Advanced system settings in the menu on the left.
- Click on Environment Variables.
- Under System Variables, find ‘Path’ and click on it to highlight it.
- Click on Edit, and in the next window, click on New.
- Type the path to your installation directory (your version number may be different) and press Enter: C:\Program Files\Java\jdk-13.0.2\bin
- Click OK on the three opened windows to accept the settings and close them. You can also close the Control Panel.
Java is typically installed in the directory below. If you have a different JDK version, please change the directory to reflect that.
C:\Program Files\Java\jdk-13.0.2\binThe final step is to confirm that the PATH variable has been set.
- Click on the Start/Windows button, type cmd and press Enter to open the Command Prompt.
- Type the following command and press Enter: javac --version
You should see the version number that was just installed.
If you get an error, it’s probably because the installation directory is incorrect in the path variable. Double check that the path is correct and it should work.
How to download and install the Eclipse IDE
If you want to follow along the tutorial series with Eclipse, follow the steps below to download and install it.
1. Point your browser to the Eclipse Packages downloads page and download the Eclipse Installer for whichever operating system you use.
2. Once the download has finished, launch the installer executable (Windows) or unzip the download to create the installer (Mac, Linux).
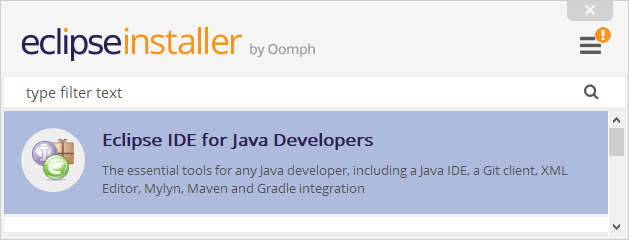
3. We want to select the standard Eclipse IDE for Developers package.
4. Select your installation folder, and the JDK version you want to use and click Install.
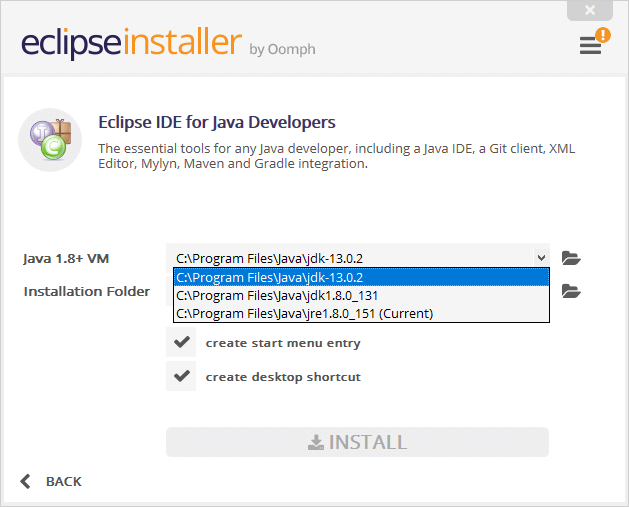
In our case we left the installation folder at default, and selected the JDK version 13.0.2 we installed earlier.
5. Throughout the installation, Eclipse will ask you to accept terms and certificates. Check the checkboxes and click on Accept.

6. Wait for the installation to finish and click on Finish.
When you run Eclipse, it will ask you to select a workspace. We will cover workspace setup in the next lesson .
Alternative Java IDEs
Every Java developer needs an editor (or IDE) that can help save time and effort, as well as create a standard development process for you, your team, or organization.
Deciding on an IDE depends on your specific needs, such as your level of skill, your role in an organization, the process used by your development team, the type of projects under development, and your personal preferences.
The three most popular choices in the world are IntelliJ IDEA, Eclipse, and Netbeans. These aren’t the only choices though.